
Introduction
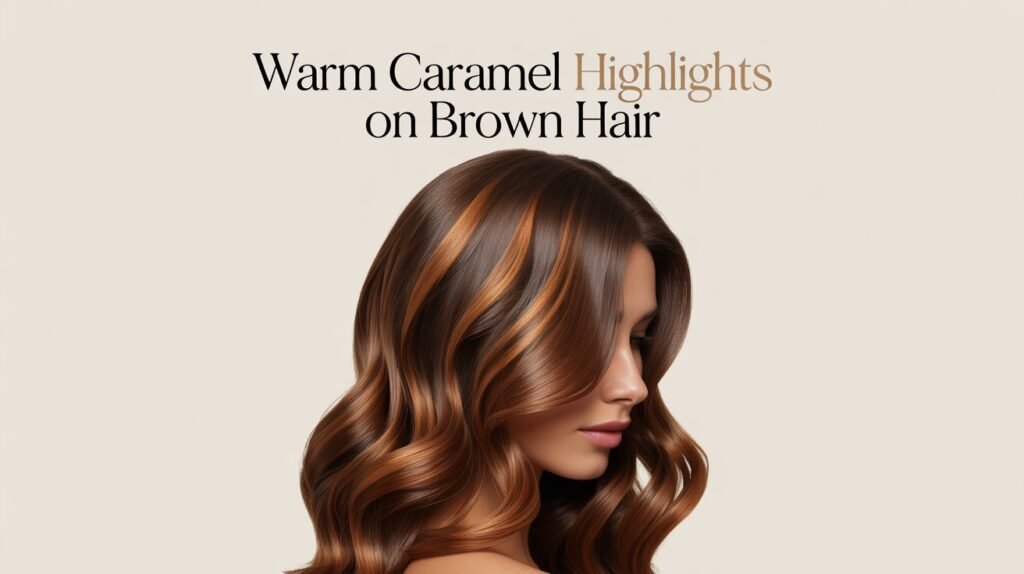
Alright—so you’re thinking about caramel highlights on brown hair, huh? Great choice. There’s something magical about warm caramel tones weaving through rich chocolate or espresso browns. It’s like giving your hair a sun-kissed glow without going full bleach-fest.
I remember the first time I asked my colorist for caramel highlights: I was nervous she’d end me up looking like a burnt cinnamon roll. But when it turned out right? Pure hair joy. In this guide, I’m going to walk you through every little thing—picking shades, techniques, care, mistakes, inspiration, the works. Think of me as your hair color buddy.
Let’s get into it—no fluff, just real talk.
Why Choose Caramel Highlights on Brown Hair?
The Appeal (Why It Works)
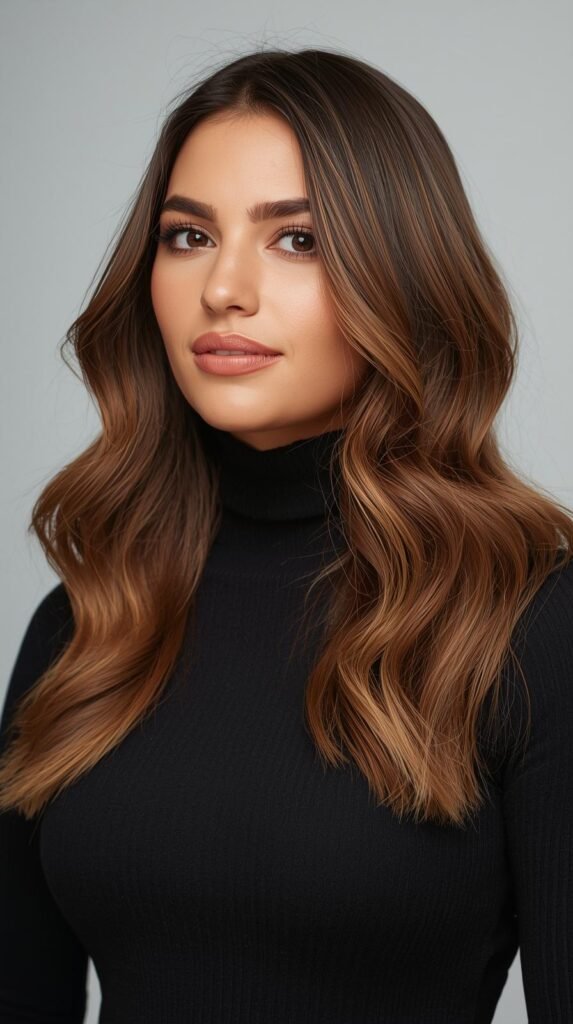
- Caramel highlights add warmth, dimension, and depth to otherwise flat brown hair. Stylists emphasize this all the time. Rush Hair & Beauty+1
- They brighten up the face without going super blonde (safer move).
- They let you play with contrast subtly—your base stays brown, but those caramel threads give it life.
- It’s versatile. You can go soft and subtle or bold and striking.
Who It Suits (And Who to Be Careful With)
- If your brown is deep and cool-toned, pick neutral-to-ash caramel to avoid unwanted orangey vibes.
- Warm or neutral browns get along beautifully with golden or coppery caramel.
- If your hair is damaged or fragile, highlight with caution. It involves lightening.
- If your skin tone is very cool, too-warm caramel can clash—balance is key.
Choosing the Right Caramel Tone
Warm vs Cool Caramel
- Warm caramel = golden, honey, coppery undertones. Great for warm skin tones or when you want brightness.
- Cool or neutral caramel = minimize orange cast, better for cool skin tones or if you lean red-sensitive.
How Many Shades Lighter?
You don’t want to jump 6-7 levels (unless you’re okay with heavy upkeep).
Most pros suggest going 2–4 levels lighter than your base for a natural blend.
Go lighter only if your hair can tolerate it.
Placement & Technique Choices
- Face-framing highlights / money pieces: draw attention to your face.
- Balayage / hand-painted strokes: softer, more natural grow-out.
- Foil highlights: more contrast, defined streaks.
- Partial vs full highlights: partial reserves emphasis near top/middle; full floods throughout.
As Pinterest shows, you can mix techniques to get unique effects. Pinterest
Popular Techniques & Styles
Let’s talk how stylists actually put caramel into brown hair—so you know options and can ask for what you want.
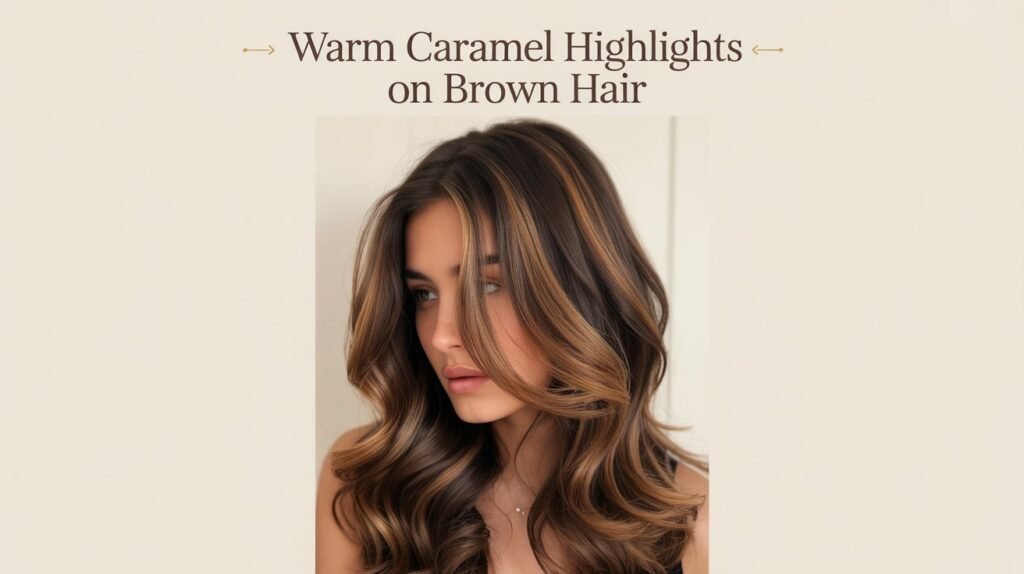
Balayage Caramel
This is my personal favorite. You get that lived-in look with gradual brightness. It grows out gracefully. Wella’s inspo gallery shows gorgeous caramel balayage options for brunettes. wella.com

Face-Framing / Money Pieces
Bold caramel strips near your face. It’s a statement move. Celebs often rock this to highlight cheekbones and eyes. InStyle+1
Subtle Caramel Veils
Tiny, soft caramel threads woven throughout. Think “blink-and-you’ll-miss-it, but hair looks luminous.” Works when you want color but low drama.
Ombre / Root Melt with Caramel
Leaves your roots darker for low maintenance; caramel shines toward the ends. It’s great if you don’t want frequent touch-ups.
Mixed Techniques
Stylists often combine:
- Foils + balayage
- Money pieces + balayage
- Veils + face-framing
These mixes let you customize contrast and maintenance levels.
Pre-Color Prep: What You Must Know
Hair Health Check
If your hair is dry, brittle, or has split ends—treat it before highlighting. A mini trim or deep-conditioning treatment helps. Dry hair = uneven lift.
Consultation & Color Tests
Ask your stylist to do a strand test first. That little sample section shows how your hair will respond.
Bring inspo pics—and be honest about your current color, past color history, and your hair’s condition.
Bond-Building Treatments
Many stylists use bond-repair products (Olaplex, etc.) to protect hair during lightening. Insist if your hair is fragile.
Understand the Process
Lightening + toning usually. First, your hair will lift (maybe yellow or orange undertones), then they tone toward your desired caramel shade. Don’t expect your first result to match your inspo 100%.
What Happens In the Salon (Step by Step)
Here’s what to expect (in my experience) when getting caramel highlights on brown hair.
1. Consultation & Color Choice
You and stylist decide tone, contrast, placement, and technique.
2. Sectioning & Foil / Painting
They’ll section hair and either paint balayage strokes or place foils. Money pieces often come last for control.
3. Processing & Monitoring
The color is left to process. Stylist checks lift every so often to avoid over-brightening or damage.
4. Toning
After lift, a toner (or glaze) corrects brassiness and brings your caramel to life.
5. Rinsing & Treatment
Rinse with cool water, apply deep-conditioning or bond-repair masks.
6. Cut / Trim & Style
They often finish with a trim or layering to shape the highlights. Then style to show off the color.
Maintenance & Home Care
You can kill the look fast if you don’t maintain well. I’ve watched vibrant highlights fade to a muddy mess in weeks. Don’t let that be you.
Haircare Routine
- Use color-safe, sulfate-free shampoo
- Condition regularly, especially mid-lengths and ends
- Deep conditioning masks weekly
- Use color-depositing masks or caramel toners to refresh hue
Heat Styling Tips
- Always use heat protectant
- Use moderate heat settings
- Air-dry whenever possible
- Minimize hot tool usage
Touch-Up Schedules
- Balayage / root melt: touch every 3–4 months
- Foil highlights: every 6–8 weeks
- Gloss treatments: in between as needed
Protecting From Sun & Water
- UV exposure fades highlights—use UV-protective sprays
- Chlorine can strip color—use swim caps or barrier creams
- Rinse hair with plain water before swimming
Night-Time Care
- Use a silk or satin pillowcase
- Sleep loosely braided or low ponytail to reduce friction
Common Mistakes & How to Avoid Them
Let me recount some blunders I or my friends have made—so you don’t repeat them.
Going Too Light, Too Fast
Pushing your hair beyond what it can safely lift often leads to breakage or brassiness. Take it gradual.
Not Toning Enough
Skip toner? You’ll end up with orange-yellow scraps, not pretty caramel. Always tone after lift.
Skipping Bond Repair
If your stylist skips protective treatments, color may fade faster or damage more.
Choosing the Wrong Contrast
Extreme contrast can look harsh (especially on shorter hair). Match technique to length, style, and maintenance comfort.
Underestimating Fading
All color fades. Not caring for it? You’ll pay—look dull, muddy, or brassy.
Inspiration & Looks to Try
If you like seeing real styles before asking your colorist, here are some that stand out:
- Dark brown + caramel balayage: stunning contrast yet natural feel. wella.com+2InStyle+2
- Soft caramel on medium brown hair: adds dimension without drama. Rush Hair & Beauty+1
- Face-framing money pieces: bold but flattering detail. InStyle+1
- Cool-toned caramel blends: for cooler complexions. Wella coloring inspo shows this. wella.com
Bring a few styles you like to your salon. Blend inspiration—don’t expect an exact clone (hair texture, base color, lighting all differ).
How to Talk to Your Colorist (What to Ask)
When you sit down in the chair, be prepared. Here’s a little cheat-list you can use:
- Show reference photos
- Specify desired contrast (soft, moderate, high)
- Ask what level of lift your hair can handle
- Request bond or reparative treatment
- Talk upkeep frequency (do you want low or high maintenance?)
- Discuss toning options (cool, warm, neutral caramel)
- Ask about gloss or glaze refreshes
Don’t be shy. A good colorist will appreciate clarity (and fewer surprises).
Cost & Time Expectations
- High-end salons cost more (colorist experience, brand products).
- Time: expect 2–4 hours (prep, lightening, toning, styling).
- Additional costs: gloss, bond treatments, trims, maintenance products.
- Always budget extra for touch-ups and upkeep.
Summary & Final Thoughts
Caramel highlights on brown hair offer one of the most flattering, customizable ways to upgrade your look—warmth, depth, dimension, without going too blonde. But it’s not effortless. You need a good colorist, a realistic plan, and consistent care.
If I were you, I’d start with subtle caramel threads or balayage so you feel the vibe without massive commitment. Test the water. Then commit deeper if you love it (you probably will).
Let me know if you want a cheat-sheet of caramel toner formulas, a list of recommended products, or a mock consultation checklist to bring to your stylist. I’ve got more where this came from! 😊
FAQs
Q1: Will caramel highlights damage my hair?
Yes—they can, because lightening is involved. But if your hair’s in decent condition and you use bond-repair treatments, the damage can be minimal.
Q2: How long do caramel highlights last?
With good care, 8–12 weeks for highlights, maybe 3–4 months before needing a major refresh (especially balayage or root melt).
Q3: Can I do caramel highlights myself at home?
You can, but I don’t recommend for first-timers. Misplaced streaks, uneven lift, brassy tones—too many risks. If you try, do a strand test, use quality kits, and tone after.
Q4: Do caramel highlights work on dark brown or near-black hair?
Yes! But you may need more lift (stronger lightening steps) and careful toning to neutralize brassy undertones.
Q5: Which products help preserve caramel highlights?
Color-safe shampoos & conditioners, bond-repair masks, glosses/glazes, toning masks, UV-protect sprays, heat protectants.
Q6: How do I avoid my highlights looking too “chunky” or fake?
Use soft placement methods (balayage, veils), fewer foils, smoother transitions, and tone well.
Let me know if you want me to put together a printable salon prep sheet you can take with you (with reference photos, tone, contrast levels, etc.).


